Subscribe To


Thursday 14 July 2011
Sunday 19 June 2011
THE WEEKEND SHOOT
The time had FINALLY come to film our short films and to
describe it only using two words: FREAK-ING AWE-SOME!!
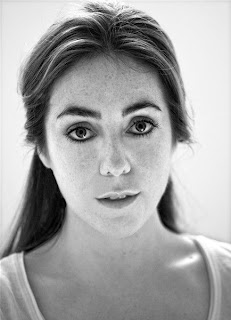 Firstly, may I introduce you to the wonderful RACHEL
CROWTHER, who we had for the whole day and like a professional, starred in
every production. She was so well-prepped; she had multiple outfits to change
in and was PERFECT each time. Currently, she is finishing her MA course in
Acting for Screen at CSSD (the Central School of Speech and Drama) and before
that, she studied Media.
Firstly, may I introduce you to the wonderful RACHEL
CROWTHER, who we had for the whole day and like a professional, starred in
every production. She was so well-prepped; she had multiple outfits to change
in and was PERFECT each time. Currently, she is finishing her MA course in
Acting for Screen at CSSD (the Central School of Speech and Drama) and before
that, she studied Media.
Now, the equipment (in which I thought I broke a light at the end when we were rapping up, thankfully I didn’t) was A-MAZ-ING. It was proper INDUSTRY STANDARD equipment as we used a Sony X1 camera to film HD quality pictures on tape. I was the CAMERA OPERATOR during the first production and it was quite tricky to get used to. It didn’t help as well as I wasn’t available to attend Saturday’s shoot so I was unfamiliar with all the equipment. The DIRECTOR, Sean helped me out with the camera work as that’s what he is most interested in and after a while I got used to it.
 Firstly, may I introduce you to the wonderful RACHEL
CROWTHER, who we had for the whole day and like a professional, starred in
every production. She was so well-prepped; she had multiple outfits to change
in and was PERFECT each time. Currently, she is finishing her MA course in
Acting for Screen at CSSD (the Central School of Speech and Drama) and before
that, she studied Media.
Firstly, may I introduce you to the wonderful RACHEL
CROWTHER, who we had for the whole day and like a professional, starred in
every production. She was so well-prepped; she had multiple outfits to change
in and was PERFECT each time. Currently, she is finishing her MA course in
Acting for Screen at CSSD (the Central School of Speech and Drama) and before
that, she studied Media.Now, the equipment (in which I thought I broke a light at the end when we were rapping up, thankfully I didn’t) was A-MAZ-ING. It was proper INDUSTRY STANDARD equipment as we used a Sony X1 camera to film HD quality pictures on tape. I was the CAMERA OPERATOR during the first production and it was quite tricky to get used to. It didn’t help as well as I wasn’t available to attend Saturday’s shoot so I was unfamiliar with all the equipment. The DIRECTOR, Sean helped me out with the camera work as that’s what he is most interested in and after a while I got used to it.
Our Male actor was unavailable to make it so that didn’t
help, however like a pro, Kieran stepped in and did very well. We LIT each
scene with proper LIGHTING and a MONITOR was available to us so we could see
what it would look like on screen, rather relying on the small monitor the
camera provides.
Then it was my turn to be DIRECTOR. As I was thinking of the
room we use for the lectures, the room we used turned out to be completely
different – typical, just typical. Some elements of the script were either cut
or had to be modified for it to work. There
were some really LOVELY shots in particular the reflection shot and the shot
were my creepy Stalker, in which Val stepped in to do, is behind Rachel. All
you can see is his outline as he is in shade – quite creepy. I can’t wait to
get my hands on it to EDIT.
After lunch, it was Kieran’s turn to direct and I was on
SOUND as SOUNDMAN. We used proper BOOMS and they are bloody heavy! His script
was very comical and it was hard to keep a straight face, it also didn’t help
that I had to place the BOOM extremely high, nearly hitting the ceiling due to
its shadow casted on the whiteboard. The first take was nearly five minutes and
I’m not very tall, so I have this eight foot BOOM, held over my head, as far as
I can stretch and I was shaking like a weakling. On the second take, I stood on
a chair which was much more comfortable.
Val was the last one to DIRECT and I would have stood in for
the male role however Val managed to get a friend in to do it, as being the
last one to shoot. His was also funny as it included a photocopy of an “ass”
and ends with Rachel at the photocopier.
Overall, the whole day was fantastic and helped me gain a
better understanding of production as even though I don’t like to film out of
continuity, it does make sense to film it out of continuity if you can use the
same shot for multiple scenes. All you have to do is give yourself enough
COVERAGE and PAUSE after the take is done so you can then EDIT seamlessly.
Thursday 16 June 2011
WEEK 4: CINEMATOGRAPHY
For this week, we had a spokeswoman who came in to teach us
about CINEMATOGRAPHY and will be with us this weekend to help us on our shoots.
Her name was Janet and some of her credits include "THE WORST WITCH",
"MURDER GAME" and a Political Broadcast for the Conservatives in 1997
where a Granny gets shot!
The EFFECT this has on the AUDIENCE leaves them at UNEASE for NO APPARENT REASON; it's like we are on DRUGS as the TWO CHARACTERS remain the SAME SIZE and STILL compared to the BACKGROUND which moves BACKWARDS and FORWARDS.
However, the EFFECT this SHOWS is the need of URGENCY and our PROTAGONIST finally sees the GREAT WHITE SHARK for the first time. It VISUALLY shows how SURREAL of the entire SCENE as we see his REACTION seeing a boy being eaten by the GREAT WHITE SHARK, which is SURREAL enough to witness, everyone PANICS and the PACE quickens, which can be seen with the QUICKNESS of this COUNTER ZOOM
SPIELBERG is a MASTER in EMOTION MANIPULATION as another thing that a CINEMATOGRAPHER needs to GRASP is the EMOTIONAL CORRELATION between what all these TOOLS they can use to CREATE the SCENE and what EMOTION EFFECT it has on the AUDIENCE.
This ORSEN WELL'S film does EXACTLY that.
The VERY FIRST IMAGE we see is the BOMB so the AUDIENCE ANTICIPATE when the bomb will EXPLODE. We KNOW that the BOMB has been place in the BONNET of the CAR in which the AUDIENCE see CONSTANTLY - WHEN will it BLOW?
TENSION is building from the OUTSET. In this OPENING we are TOLD many things:
We KNOW that it's set around the AMERICAN/MEXICAN BOARDER.
Our PROTAGONIST has just got MARRIED and he has just UNCOVERED some DRUG GANG.
Just like "CITIZEN KANE" there are no CUTS until the car EXPLODES at the end of the clip.
Another example (however I couldn't find it on YT) is from "ROSEMARY'S BABY" a 1968 film by POLANSKI. This scene that I will discuss about makes the AUDIENCE REACT in a way in which the EVENT was ACTUALLY happening.
The TELEPHONE SCENE in which we can HEAR the Grandmother on the PHONE, however we can't see her face - the AUDIENCE in the cinema's all TURNED THEIR HEADS to see AROUND the door frame. Very CLEVER!
LIGHTING.
Another CRUCIAL thing that needs to be understood is the IMPORTANCE of LIGHTNING as OVER LIGHTNING or UNDER LIGHTNING can really SPOIL a SCENE.
CINEMATOGRAPHERS get the SACK if they don't LIGHT an ACTOR/RESS properly to hide their wrinkles or something. You can use LIGHTING to aid your CREATION of a THREE DIMENSIONAL IMAGE as you LAYER the two types of LIGHT we have: HARD and SOFT light.
HARD LIGHT is sunlight on a clear sky whilst SOFT LIGHT is the amount of LIGHT pass through a CLOUDY SKY. Therefore, it's how much SHADOW is in the scene.
If you were to watch the clip from "TOUCH OF EVIL" look how LIGHT has been LAYERED to create SHADOW - we see the SHADOW of the guy with the bomb across the wall and overall the scene is in SOFT LIGHT as there are a lot of SHADOWS.
This can also help us to DETERMINE what the STYLE of a film is. GENRES such as HORROR and FILM NOIR will be in SOFT LIGHT as they RELY on SHADOW to create SUSPENSE, TENSION and ANXIETY as that's what we would EXPECT to see. However, a COMEDY or a MUSICAL would be HARD LIGHT as there are no SHADOWS at all.
SOFT LIGHT comes with a WARNING: It MAY FLATTEN THE IMAGE as there are no LAYERS.
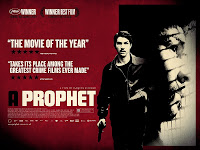 "A
PROPHET" a 2009 French Film by JACQUES AUDIARD has INCREDIBLE LIGHTING and
we just watched the opening SEQUENCE which was PITCH BLACK and the best to
describe is that the LIGHT looks like to be from an annoying light bulb that
swings as it just HITS the DETAIL in which we NEED to SEE i.e. the handcuffs,
the bars, our CENTRAL CHARACTER'S face.
"A
PROPHET" a 2009 French Film by JACQUES AUDIARD has INCREDIBLE LIGHTING and
we just watched the opening SEQUENCE which was PITCH BLACK and the best to
describe is that the LIGHT looks like to be from an annoying light bulb that
swings as it just HITS the DETAIL in which we NEED to SEE i.e. the handcuffs,
the bars, our CENTRAL CHARACTER'S face.
If you have the opportunity to watch it, do so!
All of this I WISHED I knew more about as looking back at HEADLINE, for a HORROR film there was quite a lot of LIGHTING which we couldn't avoid - we HAD to film in in a SUMMER'S AFTERNOON and I won't have NO WHERE NEAR the equipment I am going to have on Sunday. Yet this is all just a LEARNING CURVE and I have been thinking about how I would film my SECOND FILM.
I've been trying to work out how I would FILM the laptop and BLOCK out the CREW'S and the CAMERA REFLECTIONS as that was another thing in which went wrong in HEADLINE - I think to do this, I need to CAST SHADOW on the part of the LAPTOP in which our REFLECTIONS will be seen and just show our TWO CHARACTERS.
Another PROBLEMATIC scenario will be how to CLOSE A DOOR via the SUPERNATURAL - that will be the first thing I will FILM as it will be CHALLENGING to do. I have an IDEA so fingers' cross it'll WORK.
Thanks again Janet for this week's seminar!
Her background is actually stemmed from English as she
studied the subject at York University however she got involved in Independent
Films. She then learnt Cinematography at the National Film and Television
School.
One of the first things that she showed us was the beginning
of a DVD which you can buy from the BFI, called "VISION OF LIGHT."
It's relatively old but in the opening two minutes, we learnt ONE MAJOR thing
about the role:
"A CINEMATOGRAPHER needs to TELL the AUDIENCE what they
NEED to look at." It's a CREATIVE
PROCESS rather a CRAFT as well as an INTERPRETIVE ART FORM rather than
recording LIVE ACTION.
HOW TO TELL A STORY?
To achieve this, we need to learn and understand the CAMERA
and AESTHETICS to create a perfect balance between the TECHNICAL side and the
ARTISTIC side. There are TWO things about CAMERA that as a CINEMATOGRAPHER you
need to understand how it can EFFECT the image and they are: LENS and
LIGHTNING.
LENS.
There are two types of LENS that we can use, a WIDE lens and
a LONG lens. The WIDE lens shows an ELONGATED PERSPECTIVE and as we ZOOM IN, we
COMPRESS that PERSPECTIVE to narrow the DEPTH OF FILED we have.
This in turn allows us to FOCUS on what needs to be IN FOCUS
and directs the AUDIENCE'S EYE in where we want them to look, which we was
TAUGHT right at the beginning.
A COUNTER ZOOM is where the CAMERA moves BACK as you ZOOM IN
and keep the FRAME the same SIZE. The EFFECT of this keeps the SUBJECT where
they are and the BACKGROUND ALTERS and moves.
Here are two examples:
The EFFECT this has on the AUDIENCE leaves them at UNEASE for NO APPARENT REASON; it's like we are on DRUGS as the TWO CHARACTERS remain the SAME SIZE and STILL compared to the BACKGROUND which moves BACKWARDS and FORWARDS.
However, the EFFECT this SHOWS is the need of URGENCY and our PROTAGONIST finally sees the GREAT WHITE SHARK for the first time. It VISUALLY shows how SURREAL of the entire SCENE as we see his REACTION seeing a boy being eaten by the GREAT WHITE SHARK, which is SURREAL enough to witness, everyone PANICS and the PACE quickens, which can be seen with the QUICKNESS of this COUNTER ZOOM
SPIELBERG is a MASTER in EMOTION MANIPULATION as another thing that a CINEMATOGRAPHER needs to GRASP is the EMOTIONAL CORRELATION between what all these TOOLS they can use to CREATE the SCENE and what EMOTION EFFECT it has on the AUDIENCE.
This ORSEN WELL'S film does EXACTLY that.
The VERY FIRST IMAGE we see is the BOMB so the AUDIENCE ANTICIPATE when the bomb will EXPLODE. We KNOW that the BOMB has been place in the BONNET of the CAR in which the AUDIENCE see CONSTANTLY - WHEN will it BLOW?
TENSION is building from the OUTSET. In this OPENING we are TOLD many things:
We KNOW that it's set around the AMERICAN/MEXICAN BOARDER.
Our PROTAGONIST has just got MARRIED and he has just UNCOVERED some DRUG GANG.
Just like "CITIZEN KANE" there are no CUTS until the car EXPLODES at the end of the clip.
Another example (however I couldn't find it on YT) is from "ROSEMARY'S BABY" a 1968 film by POLANSKI. This scene that I will discuss about makes the AUDIENCE REACT in a way in which the EVENT was ACTUALLY happening.
The TELEPHONE SCENE in which we can HEAR the Grandmother on the PHONE, however we can't see her face - the AUDIENCE in the cinema's all TURNED THEIR HEADS to see AROUND the door frame. Very CLEVER!
LIGHTING.
Another CRUCIAL thing that needs to be understood is the IMPORTANCE of LIGHTNING as OVER LIGHTNING or UNDER LIGHTNING can really SPOIL a SCENE.
CINEMATOGRAPHERS get the SACK if they don't LIGHT an ACTOR/RESS properly to hide their wrinkles or something. You can use LIGHTING to aid your CREATION of a THREE DIMENSIONAL IMAGE as you LAYER the two types of LIGHT we have: HARD and SOFT light.
HARD LIGHT is sunlight on a clear sky whilst SOFT LIGHT is the amount of LIGHT pass through a CLOUDY SKY. Therefore, it's how much SHADOW is in the scene.
If you were to watch the clip from "TOUCH OF EVIL" look how LIGHT has been LAYERED to create SHADOW - we see the SHADOW of the guy with the bomb across the wall and overall the scene is in SOFT LIGHT as there are a lot of SHADOWS.
This can also help us to DETERMINE what the STYLE of a film is. GENRES such as HORROR and FILM NOIR will be in SOFT LIGHT as they RELY on SHADOW to create SUSPENSE, TENSION and ANXIETY as that's what we would EXPECT to see. However, a COMEDY or a MUSICAL would be HARD LIGHT as there are no SHADOWS at all.
SOFT LIGHT comes with a WARNING: It MAY FLATTEN THE IMAGE as there are no LAYERS.
 "A
PROPHET" a 2009 French Film by JACQUES AUDIARD has INCREDIBLE LIGHTING and
we just watched the opening SEQUENCE which was PITCH BLACK and the best to
describe is that the LIGHT looks like to be from an annoying light bulb that
swings as it just HITS the DETAIL in which we NEED to SEE i.e. the handcuffs,
the bars, our CENTRAL CHARACTER'S face.
"A
PROPHET" a 2009 French Film by JACQUES AUDIARD has INCREDIBLE LIGHTING and
we just watched the opening SEQUENCE which was PITCH BLACK and the best to
describe is that the LIGHT looks like to be from an annoying light bulb that
swings as it just HITS the DETAIL in which we NEED to SEE i.e. the handcuffs,
the bars, our CENTRAL CHARACTER'S face. If you have the opportunity to watch it, do so!
All of this I WISHED I knew more about as looking back at HEADLINE, for a HORROR film there was quite a lot of LIGHTING which we couldn't avoid - we HAD to film in in a SUMMER'S AFTERNOON and I won't have NO WHERE NEAR the equipment I am going to have on Sunday. Yet this is all just a LEARNING CURVE and I have been thinking about how I would film my SECOND FILM.
I've been trying to work out how I would FILM the laptop and BLOCK out the CREW'S and the CAMERA REFLECTIONS as that was another thing in which went wrong in HEADLINE - I think to do this, I need to CAST SHADOW on the part of the LAPTOP in which our REFLECTIONS will be seen and just show our TWO CHARACTERS.
Another PROBLEMATIC scenario will be how to CLOSE A DOOR via the SUPERNATURAL - that will be the first thing I will FILM as it will be CHALLENGING to do. I have an IDEA so fingers' cross it'll WORK.
Thanks again Janet for this week's seminar!
Wednesday 15 June 2011
WEEK 3: BREAKING THE RULES.
THIS IS AN EXTREMELY LATE POST WHICH I APOLOGISE FOR. I HAD QUITE A FEW ERRORS TRYING TO BLOG THIS WEEK'S ON MY LAPTOP
-------------------------------------------------------------------------------------------------------------------------------------
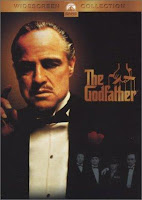 The classic known as “THE GODFATHER” a 1972 film by Francis
Ford Coppola is a prime example where this basic rule of FRAMING a CONVERSATION
is broken. The scene involves Johnny meeting his wife at dinner. The scene
starts with the norm, having his wife on the LEFT SIDE of FRAME and Johnny on
the RIGHT SIDE of FRAME however half way through, they BOTH appear on the LEFT
SIDE of FRAME. This was something in which you SPOT STRAIGHT AWAY and was quite
CONFUSING.
The classic known as “THE GODFATHER” a 1972 film by Francis
Ford Coppola is a prime example where this basic rule of FRAMING a CONVERSATION
is broken. The scene involves Johnny meeting his wife at dinner. The scene
starts with the norm, having his wife on the LEFT SIDE of FRAME and Johnny on
the RIGHT SIDE of FRAME however half way through, they BOTH appear on the LEFT
SIDE of FRAME. This was something in which you SPOT STRAIGHT AWAY and was quite
CONFUSING.
However, there is a REVERSAL in the story and this is VISUALLY told in breaking the 180 DEGREE ARC RULE as they have too REVERSED, almost like a MIRROR’S IMAGE. Again, this JUSTIFIES why the RULE is BROKEN.
-------------------------------------------------------------------------------------------------------------------------------------
SCRIPT DEVELOPMENT.
I have been re-drafting my script, something that you ALWAYS do. The manin reason in why I decided to do this was because can I really bring in a and change knife to the University and not get caught?
It will be sensible to DELETE that part out and change a few things as it will be filmed this SUNDAY.
-------------------------------------------------------------------------------------------------------------------------------------
After being taught several RULES and THEORIES in which
DIRECTORS can apply to scripts, there are some DIRECTORS that have BROKEN the
RULES and have got away with it! To achieve this, you need a SOLID
UNDERSTANDING of them before you can even attempt to break them as you need to
understand WHY you can break them. Is it NECESSARY for you to break them? Will
the AUDIENCE be left DISORIENTATED?
To SET-UP a very basic conversation, TWO CAMERAS will be
placed OVER-THE-SHOULDER of CHARACTER A and CHARACTER B. Therefore, CHARACTER A
will be in the LEFT-SIDE of FRAME and CHARACTER B will be in the RIGHT-SIDE of
FRAME. The AUDIENCE will then recognise this as the NORM and to then change
this half way through can cause the AUDIENCE to be CONFUSED.
 The classic known as “THE GODFATHER” a 1972 film by Francis
Ford Coppola is a prime example where this basic rule of FRAMING a CONVERSATION
is broken. The scene involves Johnny meeting his wife at dinner. The scene
starts with the norm, having his wife on the LEFT SIDE of FRAME and Johnny on
the RIGHT SIDE of FRAME however half way through, they BOTH appear on the LEFT
SIDE of FRAME. This was something in which you SPOT STRAIGHT AWAY and was quite
CONFUSING.
The classic known as “THE GODFATHER” a 1972 film by Francis
Ford Coppola is a prime example where this basic rule of FRAMING a CONVERSATION
is broken. The scene involves Johnny meeting his wife at dinner. The scene
starts with the norm, having his wife on the LEFT SIDE of FRAME and Johnny on
the RIGHT SIDE of FRAME however half way through, they BOTH appear on the LEFT
SIDE of FRAME. This was something in which you SPOT STRAIGHT AWAY and was quite
CONFUSING.
But there was a PURPORSE for this madness.
The BALANCE of their relationship had shifted and this was
VISUALLY told via the SHIFT in FRAMING and how it became UNBALANCE. The
CHARACTERS don’t know what will happen and were CONFUSED. This SHIFT in FRAMING
therefore makes the AUDIENCE CONFUSED.
The PURPOSE of this decision has been justified.
LINES OF ACTION AND THE 180 DEGREE ARC.
A DIRECTOR has to be AWARE of the LINE OF ACTION during a
SCENE and they can be seen EASILY – they FOLLOW the ACTION.
For example, if we had two people sitting down on opposite
ends of a table, their LINE OF ACTION would be their EYE LINE, an INVISIBLE
LINE that DIVIDES the scene in HALF.
(NOTE: LINES OF ACTION MIGHT NOT NECCESARILY DIVIDE THE
SCENES IN HALF. IN THIS EXAMPLE HOWEVER, IT DOES.)
Once a DIRECTOR has DRAWN this INVISIBLE LINE then they can
use the 180 DEGREE ARC RULE. The PURPOSE of this ARC is for CONTINUITY reasons
and will mean for the EDITIOR that if all the SHOTS were shot in the same 180
DEGREE ARC then they can ALL be EDITED together. If ONE SHOT was shot on the
opposite side of that ARC, it will FLIP the SHOT and again may result in the
AUDIENCE to be CONFUSED.
However, if we were to go back to the example above about
TWO CHARACTERS sitting at a table and a THIRD CHARACTER enters the room and
CHARACTER A needs to talk to them, the DIRECTOR needs to GENRATE a NEW LINE OF
ACTION. To do this, we first need to
INTRODUCE this new CHARACTER and we can do this in TWO WAYS:
1.
CUT AWAY to the FRONT DOOR and see CHARACTER C
ENTER.
2.
MOVE the CAMERA in a front position to keep
CHARACTER A on the LEFT SIDE of FRAME however we can SEE CHARACTER C enter the
building and more importantly, they are on the RIGHT SIDE of FRAME.
Option 2 is more PLAUSABLE as in that re-positioning of the
CAMERA; it MAINTAINS the LEFT and RIGHT SIDE of FRAMING and that CHARACTER A
REMAINS on the LEFT SIDE – which is ESSENTIAL. CHARACTER A can then LOOK at
CHARACTER C and there we have it: A NEW LINE OF ACTION and in turn, an
OPORTUNITY to RE-POSITION the CAMERA in NEW locations as we now have a SECOND
180 DEGREE ARC.
Or, as DIRECTOR you can COMPLETELY break this rule – however
your name has to be STANLEY KUBRICK of course.
“THE SHINING” the 1980 MASTERPIECE has one SCENE in which
this 180 DEGREE ARC RULE is SHATTERED, but for a REASON.
The BATHROOM SCENE
involving Jack Nicholson and the “Caretaker” where Jack is told by the
“Caretaker” that in fact HE is the “Caretaker” is where this happens.
However, there is a REVERSAL in the story and this is VISUALLY told in breaking the 180 DEGREE ARC RULE as they have too REVERSED, almost like a MIRROR’S IMAGE. Again, this JUSTIFIES why the RULE is BROKEN.
-------------------------------------------------------------------------------------------------------------------------------------
SCRIPT DEVELOPMENT.
I have been re-drafting my script, something that you ALWAYS do. The manin reason in why I decided to do this was because can I really bring in a and change knife to the University and not get caught?
It will be sensible to DELETE that part out and change a few things as it will be filmed this SUNDAY.
Sunday 5 June 2011
WEEK 2: VISUAL STORYTELLING CONT'D/SCREENWRITING
SELECTIVE FOCUS
A Director can use SELECTIVE FOCUS to guide what the audience should pay attention to by blurring therest of the scene and that the only thing to be in focus is the object/person which is significant in the scene.
A Director can use SELECTIVE FOCUS to guide what the audience should pay attention to by blurring therest of the scene and that the only thing to be in focus is the object/person which is significant in the scene.
 “THE INSIDER”, a 1999 film by Michael Mann was our example of how a Director can use PULL FOCUS, switching focus from one thing to another, i.e. from background to foreground. There were two reasons why this scene was chosen:
1. For an example for SELCETIVE FOCUS.
2. Visual SET-UP for a character.
THERE IS NO DIALOGUE IN THIS SCENE.
Dante Spinotti, the Cinematographer for the film uses PULL FOCUS to great effect. In a separate room, there is a party and we PULL FOCUS from that, through the glass and FOCUS on the panel of glass to see the reflection of our protagonist. This was a well-constructed scene that was executed with perfection. The scene is about LEAVING and our protagonist feels like an outsider rather than an insider. He is the only one that doesn’t wear white and he doesn’t attend his own leaving party.
We are told this through ACTION and VISUAL PICTURES. To add further paranoia, as our protagonist leaves the building, security watches him carefully as later we discover that he is a whistle-blower and sell secrets about the tobacco industry.
However, DIGITAL CAMERAS are extremely limited when using SELECTIVE FOCUS as it’s the LENS which creates this effect. The SHALLOW DEPTH OF FIELD is what is in FOCUS and everything else around and beyond this area will appear BLURRY.
 “28 DAYS LATER”, a 2002 film by Danny Boyle was our example of how creative you can be with DIGITAL CAMERAS and with a LOW BUDGET. The first SHOT after the main credit is of an eye that looks around. Then we have our ESTABLISHING SHOT of our protagonist lying on the hospital bed naked. To create the illusion of SELCTIVE FOCUS, scenes were shot through doors, through fabric, layering the shot to create a FOREGROUND.
 It’s also down to the writing that aids these shots, the door is locked from the outside and the key has been pushed through, every single receiver hangs, everyone in an instant has left. Many of the SHOTS are at a DUTCH ANGLE which create wonderful diagonal lines and that this world is filmed 3-DIMENSIONAL rather than looking 2-D. 3-DIMENSIONAL SHOTS help aid the eye and to create level of IMPORTANCE with the most important objects in the SHOT at the FOREGROUND, as well as looking BIGGER and the least important objects in the SHOT at the BACKGROUND, as well as looking SMALLER and inferior.
COMPOSITION
COMPOSITION is really important as our SHOT has to be FRAMED appropriately as too much space draws the eye of the viewer which leads to EXPECTATION.
HEAD ROOM is how in particular CLOSE-UPS are FRAMED. Ideally, you would want the SHOT to be CENTRALISED, as the closer we reach the end of FRAME; we are reaching the BOUNDARY of the story. However, this is not the case in all GENRES, for example, HORROR. Our HEAD ROOM in one particular SHOT might be off centre to create ANTICAPTION. Or, the head of the object is not the main FOCUS of the SCENE, it might be their body, i.e. in a war film they have been shot or stabbed; or it’s the BACKGROUND, so a sunset for example.
 THE RULE OF THREE is a rule that originates from painting, especially from the RENAISSANCE period. To use this rule, the SHOT would be divided into three’s and our MAIN FOCUS in the FRAME would be the FOUR CENTRE POINTS where our lines would cross.
 LEAD ROOM and NOSE ROOM however shows our object SHOT to the left of screen (LEAD) or to the right of the screen (NOSE). These can be used to show the audience what our character is heading towards, (LEAD – the future) or what is being left behind (NOSE – the past). Ideally, LEAD ROOM will be used as it can DRIVE the story forward however, if we were to use the HORROR genre again, the NOSE ROOM might be used so the AUDIENCE doesn’t see what we are heading towards.
SCREENWRITING
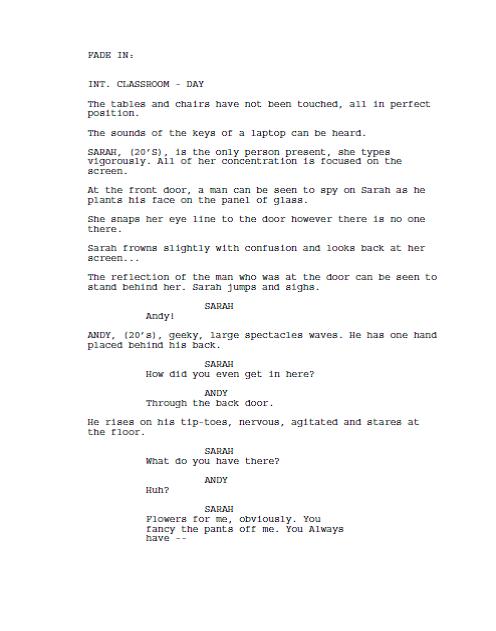
Using two examples of our lecturer’s students, we went through the BASIC STRUCTURE and FORM of a SCREENPLAY. A SCREENPLAY is the BLUEPRINT of the film and has a specific LOOK.
First of all, the FONT that is used is Courier New at size 12. This font is used as it’s the font which closely matches the old-style of typewriters in which they would have been written on.
Then, we write our SLUGLINE:
INT. CLASSROOM – DAY
The purpose of the SLUGLINE informs the DIRECTOR or PRODUCER three crucial aspects of the SCENE.
1. Is it INTERIOR or EXTERIOR? – NOTE: The CAMERA POSITION.
2. LOCATION – Where are we?
3. TIME – DAY/NIGHT.
Our ACTION LINES are SMALL BLOCKS of writing that DESCRIBE what happens:
AMANDA, (20’s) sits at the coffee table.
The very first time we INTROUDCE a CHARACTER, their name is in CAPITALS and is the only time it is. We do this as it helps the PRODUCER to quickly determine how many CHARACTERS there are.
For DIALOGUE, we firstly CENTRALISE their name in CAPITALS and write their DIALOGUE in the specific margins provided.
There are many SCREENWRITING SOFTWARES that can be used, CELTX which is for FREE or FINAL DRAFT which is a bit pricy however that is what the INDUSTRY use. So you might want to learn how to use FINAL DRAFT quickly.
BRIEF
We have been given a very constraint BRIEF which limits us to:
1. 2 CHARACTERS – a MAN and a WOMAN 20’s-30s.
2. In ONE ROOM
3. During the DAY.
4. 1 ½ pages MAX.
Below is my script for the course entitled OBSESSION.


Saturday 28 May 2011
WEEK 1: VISUAL STORYTELLING
This Wednesday was the first day of my short course: “Digital Film: A Practical Introduction” at City University. At the end of the course, I will have made my second short film, expand my knowledge of filmmaking along with some much needed practice and hopefully a new contact.
The first thing we did was to introduce ourselves, talk about any experience of any production work we may have and why we have applied for the course. Well, as you may have gathered I have made one film, “Headline”, a short horror/thriller which has a few hundred hits on YouTube. I made the film with a mate from college as a part of our coursework and the school awarded us with an award. I have been writing now for nearly a year and have joined the site Circlait, a Facebook for writers where we can upload our work.
The very session was primarily based on what a Director’s role is and why that person is important. Their job is to tell a story – very simple and that’s the main criteria in which a Director is assessed by. To do this, a Director has five components in which to do so.
1. SHOT SIZE.
2. MOVING CAMERA.
3. CAMER ANGLE.
4. SELECTIVE FOCUS.
5. COMPOSTION.
Not every component can be used whilst filming one particular scene however these can be used whilst he/she dissect the scene in the script.
SHOT SIZE
 Shot size is the most important – shots make scenes, scenes make films. Without them, there would be no film obviously. We were introduced to the three basic shot sizes: CLOSE-UP, MID-SHOT AND LONG SHOT. The selection of the shot size is extremely important as it shows the relationship between the subject and their surroundings (making it objective or subjective.) The long shot allows the audience to see the subject in its entirety; whether that is a human (head to toe), a dog (nose to tail), or a car (bonnet to bonnet.)
 Shot size is the most important – shots make scenes, scenes make films. Without them, there would be no film obviously. We were introduced to the three basic shot sizes: CLOSE-UP, MID-SHOT AND LONG SHOT. The selection of the shot size is extremely important as it shows the relationship between the subject and their surroundings (making it objective or subjective.) The long shot allows the audience to see the subject in its entirety; whether that is a human (head to toe), a dog (nose to tail), or a car (bonnet to bonnet.)
There is also a significant difference between a long shot and an ESTABLISHING SHOT. A long shot, as mentioned previously, shows the subject in its entirety, making the shot objective, whilst an establishing shot shows the context of their surroundings. Therefore, this makes the shot subjective.
We then tried to put this into practice by creating a scene of the top of our heads as a class. For convenience, we based the scene in the very room we were in. Now, as Director we have the choice to put the camera in any place of the room to convey and more importantly show the lecturer in the front of the room and us. We could place the camera at the back of the room, so we can see the lecturer and the back of our heads. Or place the camera at the front to see out faces.
This brought up our next shot, the MASTER SHOT. The Master shot is default shot for the scene and is particularly loved by the Editor as they have something to cut to. It was then decided that our Master shot would be by the door; the lecturer would be in profile and that we could be seen.
To make it interesting and not to tell too much, our first shot would be an Establishing shot of one of us at the front writing pad writing: "This guy doesn't know what he is talking about." We would then come out and have a TWO SHOT of the two guys at the front table. The guy who wrote the message shows it to his neighbour and they would both snigger.
This begins to make the audience ask questions: "Who were they talkng about? Who doesn't know what he is talking about? Where exactly are they?" Which are all GOOD.
Then, we would go to our Master shot as the lecturer begins to speak and then to a mid shot from the back of the room. This is known as COVERAGE, filming the scene in more than one type of shot and to do this, there would be two SET-UPS:
The first one would be the camera placed at the door to film our Master shot and the second, at the back of the room to film our Mid-shot.
We would then have at least another three Setups - one to film the Establishing the shot, another to film the Two-shot and the final one to film the Close-up of the lecturer.
That was our first task as it highlighted a dillema for the Director - THERE ARE SEVERAL WAYS TO SHOOT A SCENE.
MOVING CAMERA

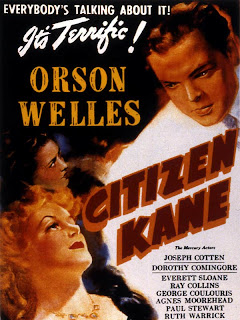
The first clip we watched was from a scene from "CITIZEN KANE", a 1941 film by Orsen Wells. The scene we watched was quite interesting as it was composed of one shot; however it was the use of camera movement that allows all of the three primary characters to stay in shot when Kane moves across the room and another character, Sonny enters.
What makes this scene that tiny bit more interesting is that we also see Kane move across the room and then across camera as well! However, in doing this, we would in fact lose a character. There was a simple resolution to this – he leans forward. Remember that this film was made in the 1940’s so this scene is pretty clever, especially when Kane writes down his pledge; he is in completely in shadow. This foresees what will happen later in the rest of the film as its theme is about corruption.
There is one more little sneaky thing that happens in the scene and this is seen when Sonny enters the scene. By showing his entrance, the camera pans to his direction ever so slightly, meaning that the same character as before is going to be lost. Kane performs a cheeky step back, allowing the camera to move along with him and to bring that character we lost momentarily back into view.
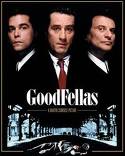 The second clip we watched was from a scene from the “GOODFELLAS”, a 1990 film by Martin Scorsese. This scene, like the previous one has no editorial cuts however it’s fancier. The protagonist introduces his girlfriend to his way of life, entering clubs from the back, handing out a huge amount of money to everyone he sees for priority treatment. The scene starts with focusing on the money as he hands it over to the cab driver, informing the audience that this is the main focus and shadows what is going to happen in the scene. The camera placed on cranes swoop elegantly tracking the two characters and this cleverly mirrors to the story, he sweeps her off her feet seeing how he is showing off to her.
 It can still be argued that it was Scorsese being flash although being a huge Hollywood production, he can afford to! The amount of rehearsal time to get it all flowing, the incredible amount of extras used on set, the construction of the set starting from outside the club to the back entrance and through all the rooms. This is an enormous amount of time and money for a three minute scene.
CAMERA ANGLE:
There are two axes that we can use; the HORIZONTAL AXIS and the VERTICAL AXIS. The VERTICAL AXIS is used to depict the STATUS of a character. If the camera is placed above the line, we look down on the character, making them smaller, less important. If we were to place the camera below the line, we look up on the character, making them superior and of a high status.
The VERTICAL AXIS is used to determine how the scene can be view as OBJECTIVE or SUBJECTIVE. The closer you come to the centre of the line; the scene becomes OBJECTIVE and more personal as it appears that the character is talking to the audience. This is imperative for good STORYTELLING as its basic human communication skills; if you are engaged with the person who is talking, you look straight in their eyes. That’s also why we are not one hundred per cent content with that scene we watched from “CITIZEN KANE” – we couldn’t see his eyes when he delivers his pledge.
Subscribe to:
Posts (Atom)